There were two enhancements to my Arduino Tone Polyphony project I was keen to explore. One was to expand the MIDI range of notes and one was to “build in” a keyboard. I have managed to create an experimental version that can support four octaves over MIDI, but tuning needs some work, so I’m not ready to write that up yet.
However, having now explored how to scan switches from a reduced number of IO pins here, I’m ready to apply the same ideas to scanning a music keyboard.
Warning! I strongly recommend using old or second hand equipment for your experiments. I am not responsible for any damage to expensive instruments!
These are the key tutorials for the main concepts used in this project:
- Arduino tone()
- How to build an Analog Mixer
- Arduino Port Manipulation
- Arduino Analog Input
- Read Multiple Switches using ADC
If you are new to Arduino, see the Getting Started pages.
Parts list
- Arduino Uno
- 12x 10k resistors
- 12x 1k resistors
- 6x 2k resistors (mine measured out at 2.1k)
- 1x 10uF non-polar capacitor
- Audio amplification
- Breadboards and jumper wires
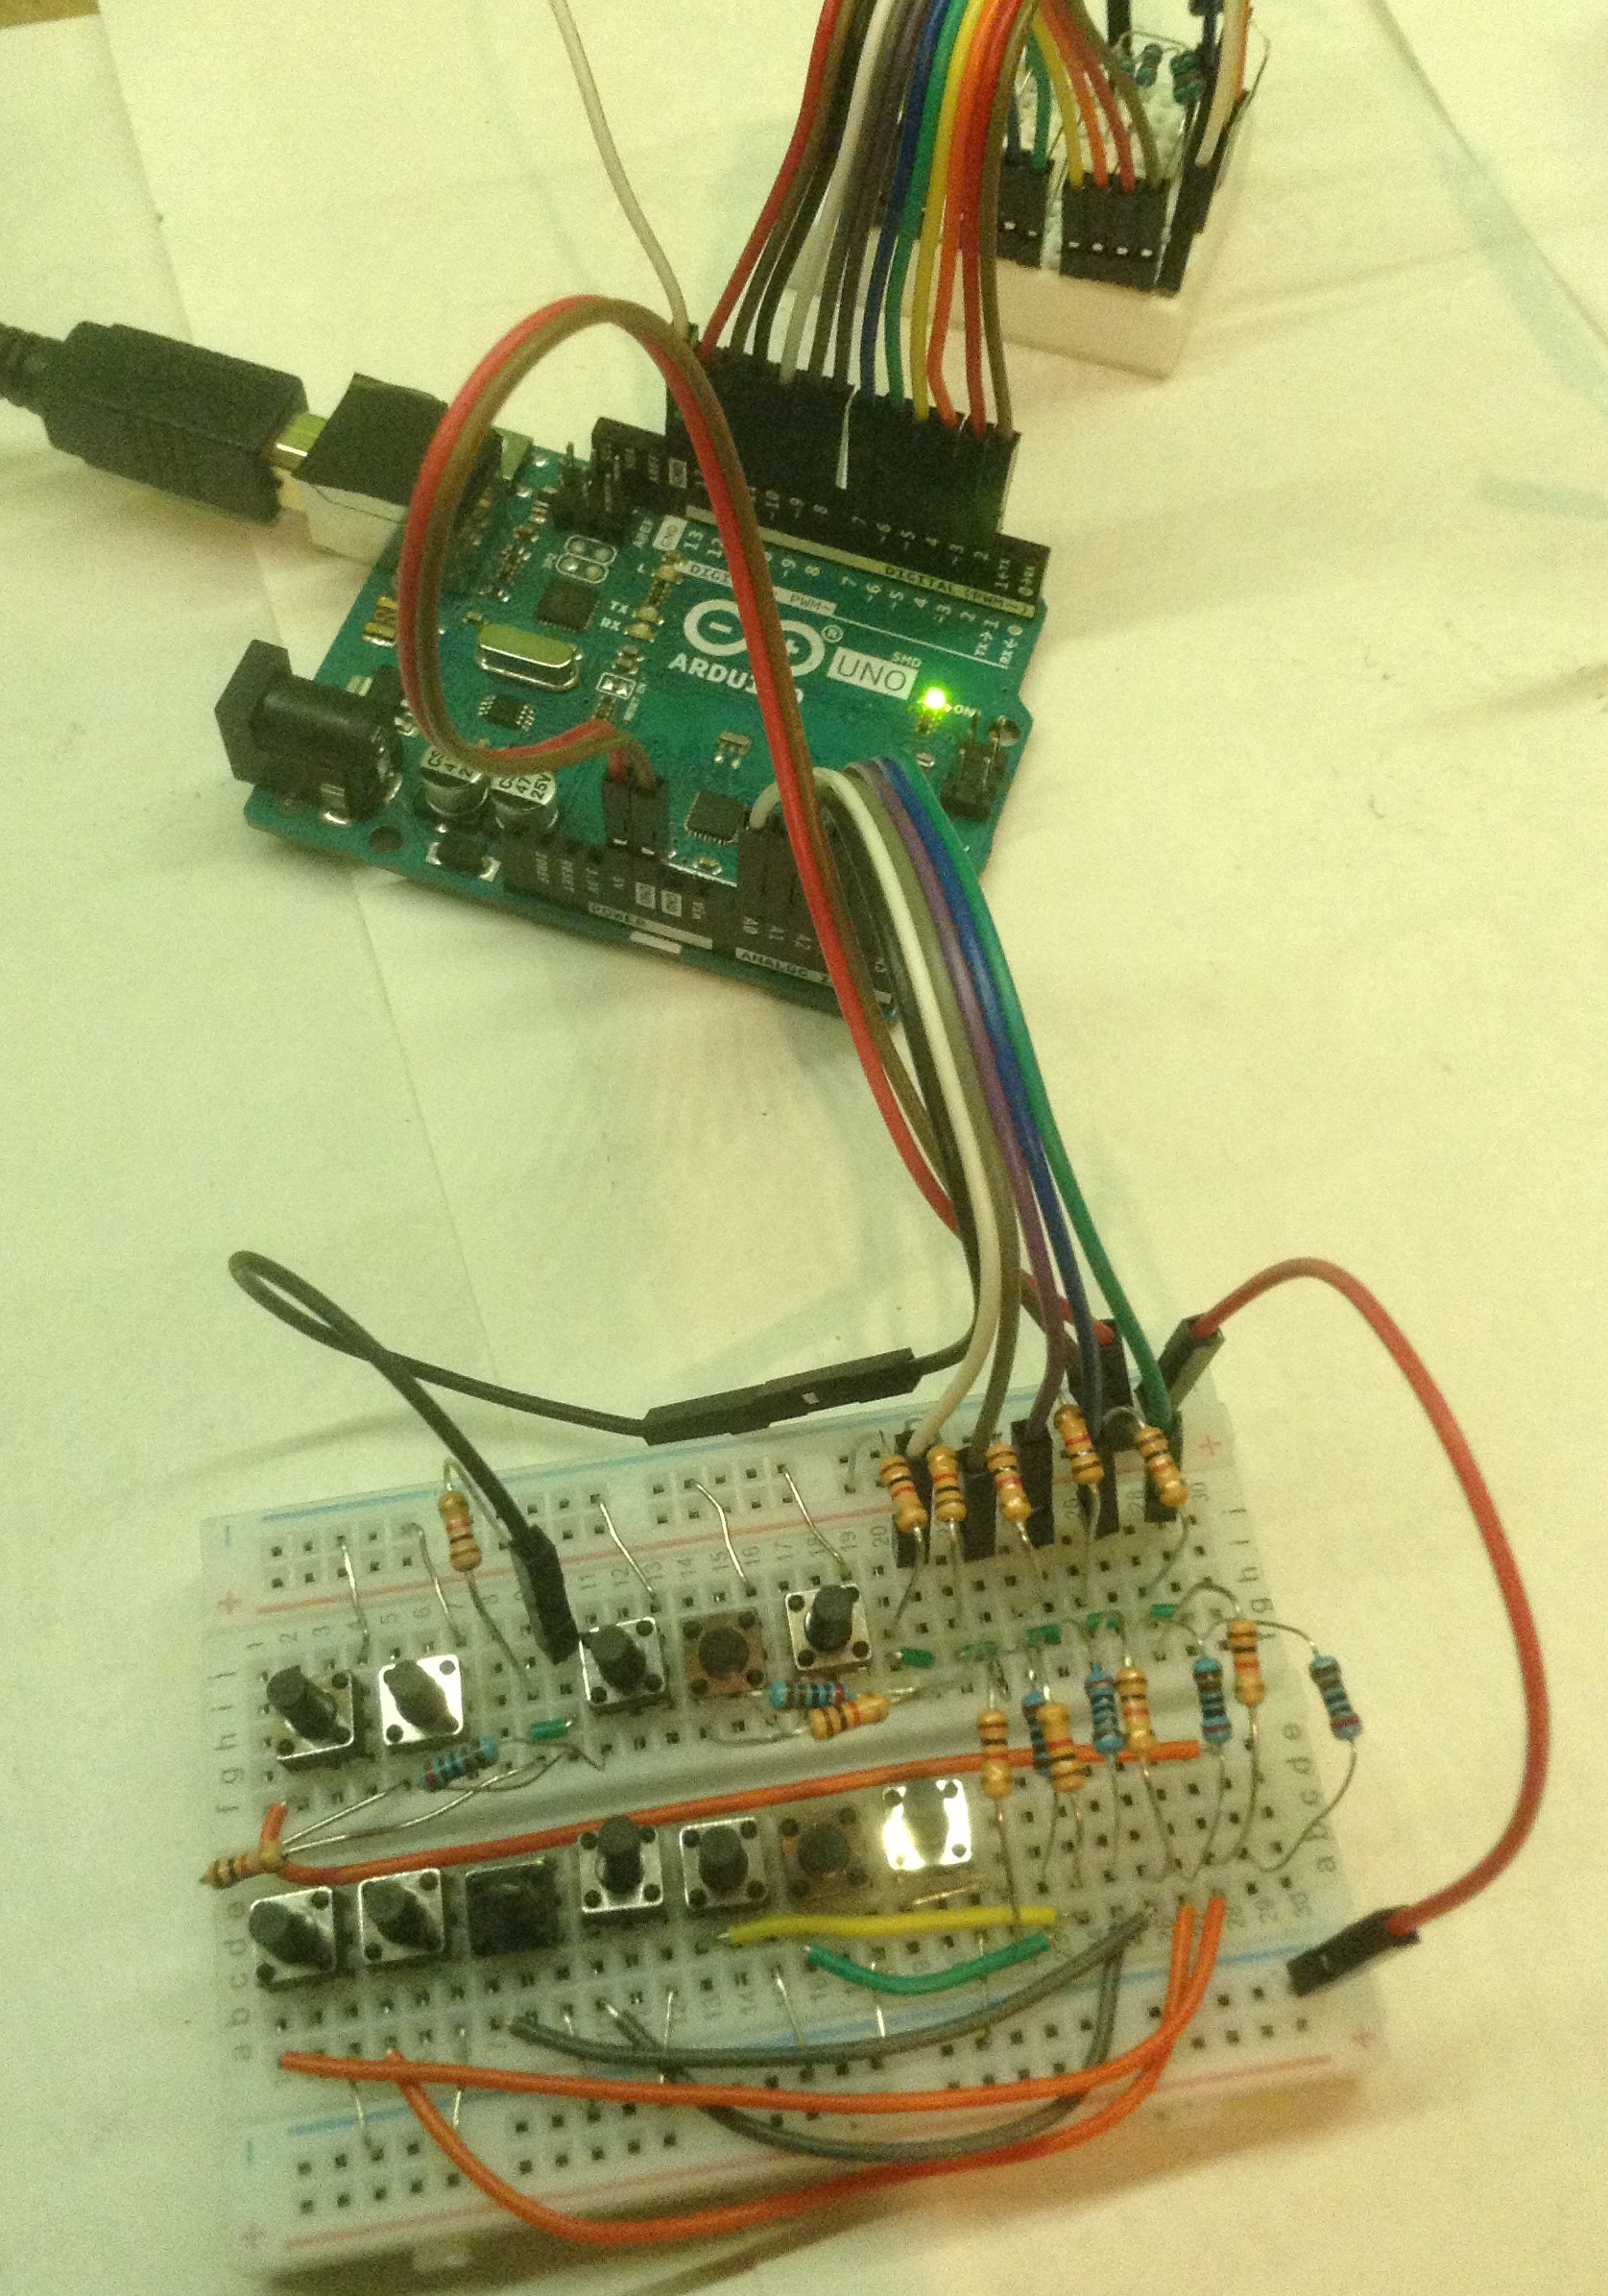
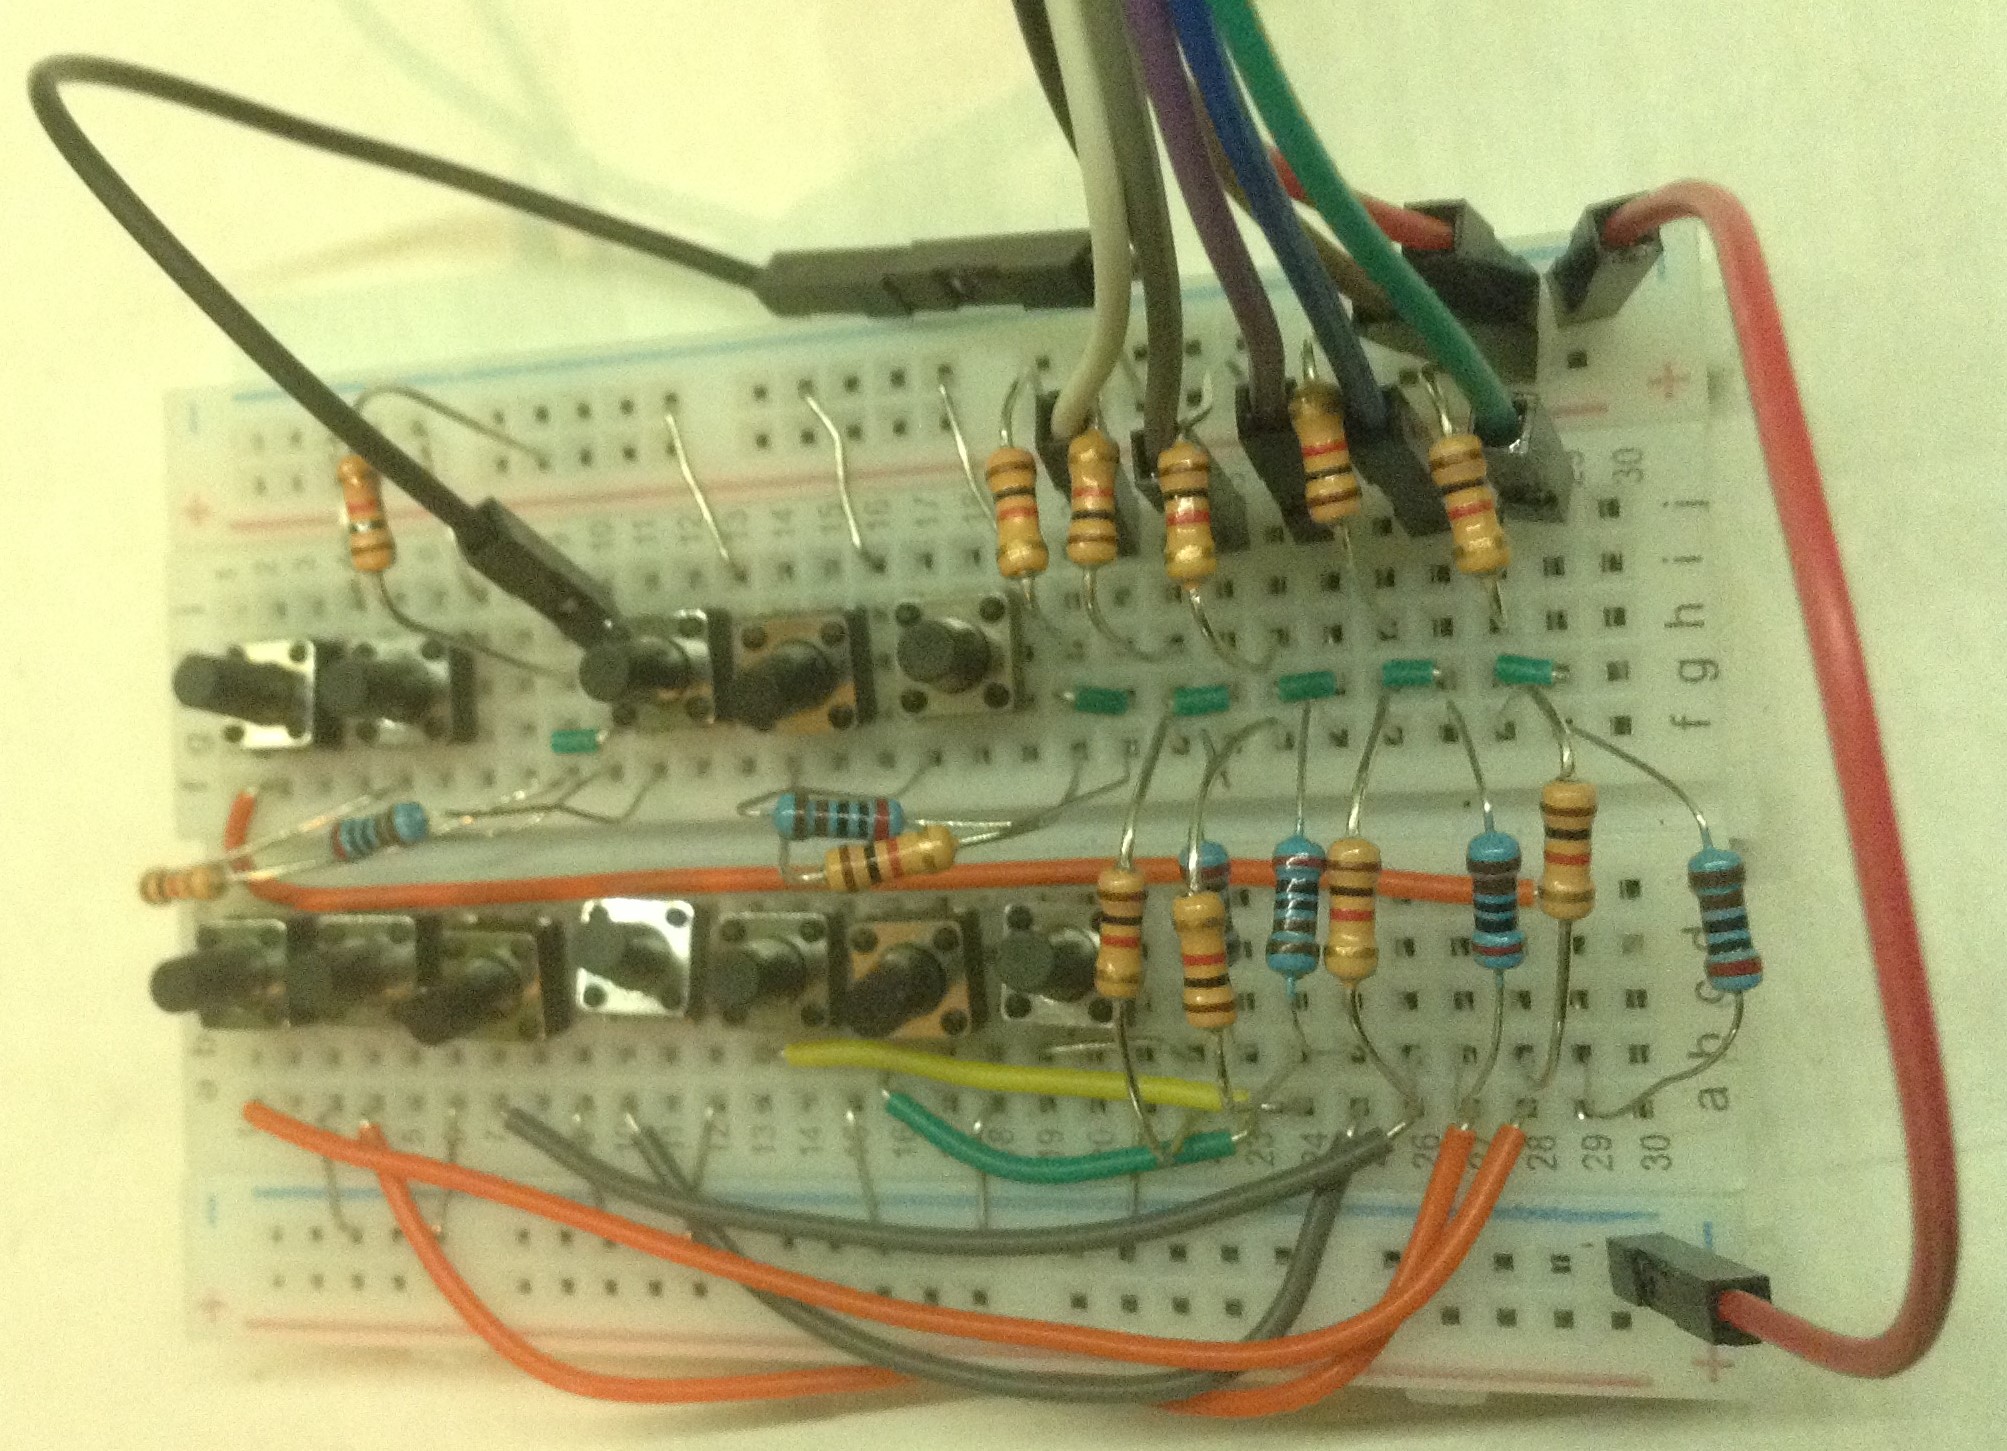
The Circuit
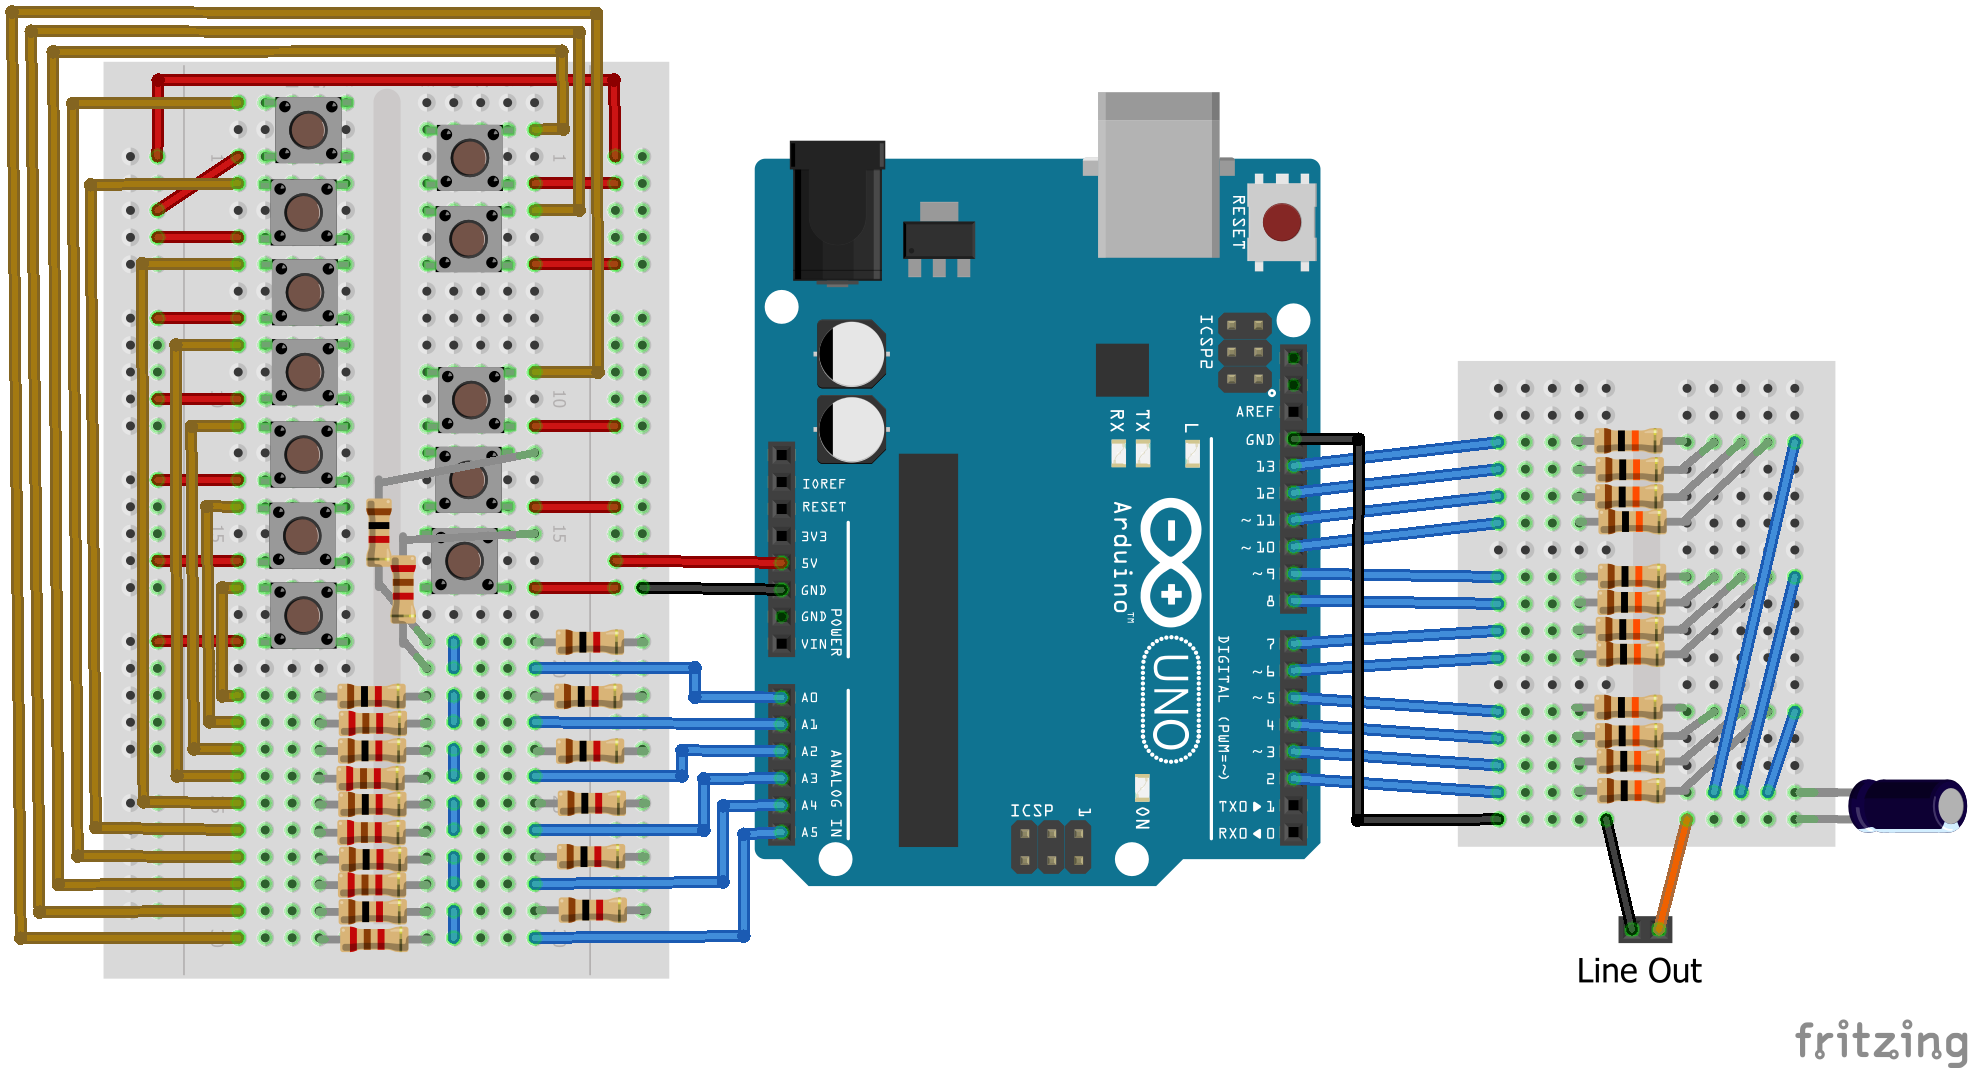
This looks complicated but the main principles are relatively straight forward. We’ve already met the output stage – the 12-way passive mixer – in part 1. I’ve just added a coupling capacitor on the output to make it more amplifier friendly.
The input stage is 6 sets of the following circuit, one for each Arduino analog input pin.
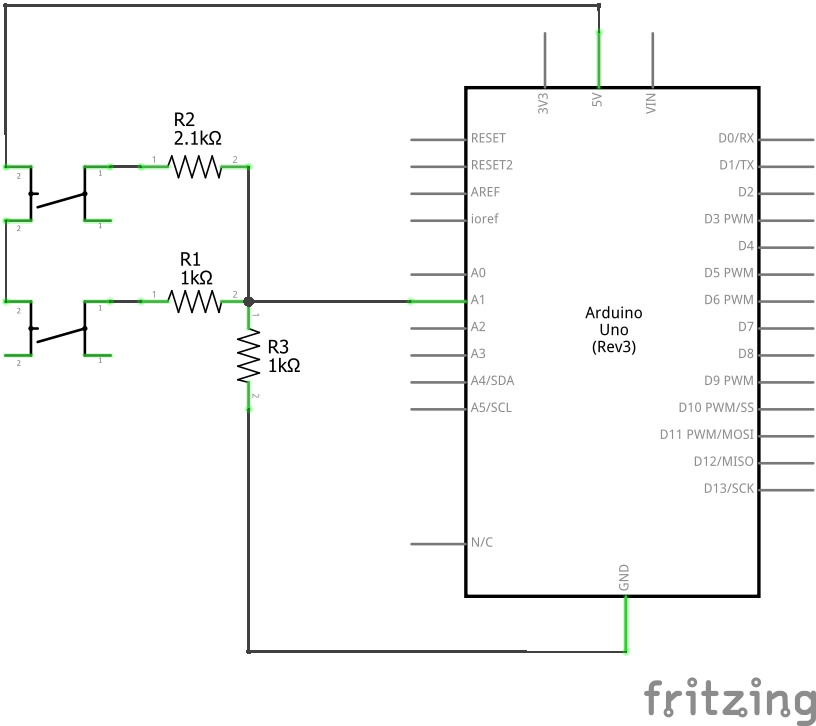
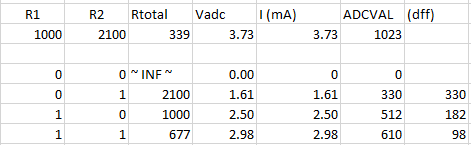
There are two switches for each input pin, giving me 12 switches in total across all six pins. Redoing the calculations from the last project for two switches and two resistors, gives me four possible values to read on each analog pin as follows:
I can thus look for analog readings to work out if one, both, or none of the switches is pressed. If you want to read more about the theory, see part 1.
The Code
The sound-producing elements of the code are the same as the original Arduino Tone Polyphony project, so I won’t repeat the details here. But now I’ve made the MIDI handling optional and added code to read the analog pins to enable the tones instead.
As mentioned above, I need to distinguish between four values on the analog port, so I set these up in an array at the top of the file.
int algValues[4] = {
   0,300,500,600
};
I’ve rounded the values down, as I’m just going to be looking for “greater than” comparisons to work out which switches are pressed.
In the main loop on each pass I read one of the analog pins and work out which switches are pressed. Then I turn on those outputs as required.
uint8_t sw = algRead(A0+algPin);
if (sw & 0x1) {
  toneenable |= (1<<(2*algPin));
} else {
  toneenable &= ~(1<<(2*algPin));
}
if (sw & 0x2) {
  toneenable |= (1<<(2*algPin+1));
} else {
  toneenable &= ~(1<<(2*algPin+1));
}
The algRead function will return 0,1,2 or 3 depending on if one (1 or 2), none (0) or both (3) switches are pressed, so we can simply use bit 0 to correspond to switch one (0x1) and bit 1 to correspond to switch two (0x2) and the code will pick up all combinations.
The variable algPin goes from 0 to 5 corresponding to A0 to A5, so to enable the right output, I can use algPin x 2 as a “bit index” into toneenable, either using it as is for switch one (for bits 0,2,4,etc) or adding 1 more for switch two (for bits 1,3,5,etc). Then I set or clear the bit depending of the switch being pressed or not.
The simplest way to build this up would be to assume the switches correspond to the notes of the scale in order – so the first switch on A0 is “C”, the second switch on A0 is “C#”, the first switch on A1 is “D” and so on, but that would create a real spaghetti in the wiring due to the layout of a music keyboard. So I’ve gone for simplifying the hardware at the expense of a bit of extra work in the software and added a “mapping” array to indicate which frequency value in the freq[] table corresponds to which switch on the analog pins.
That all happens in the algOrder[] array and means that when the frequency value is used to reset the counters for the tones, we first have to choose the right frequency for the right switch. It also means the outputs are no longer in frequency order – but in the order of the notes appearing on the analog pins.
Indexing the other way round, so that the tones were still in order, but I scanned the analog pins in the order they correspond to the notes is more complicated as I can’t simply iterate through the switches out of order. But iterating through the switches in order seems to work fine for me.
Closing Thoughts
The original aim was to emulate the “full note polyphony” of the Oskitone Poly555, but cheating and using a microcontroller. This shows that a single Arduino can support full note polyphony from a 12-note keyboard quite happily.
It would be nice to now implement this using several Arduino Nanos for a full two-octave “version” of the Poly555. But if I do that, I will need a soldered stripboard – I’m not messing about with pushed in buttons and a solderless breadboard for 24 notes!
Kevin