After having a quick play with Zynthian just over a year ago, I’ve always had it in the back of my mind to make a “proper” Zynthian box with its own interface and controls. This is the first part of that project, hooking it up to a touchscreen and some rotary encoders.
- In Part 2 I build a protoboard IO board.
- In Part 3 I present the design for a custom PCB IO board.
- In Part 4 I give the build guide for the custom PCB IO board.
- There is also a CD Rack Format Zynthian too.
Warning! I strongly recommend using old or second hand equipment for your experiments. I am not responsible for any damage to expensive instruments!
These are the key tutorials for the main concepts used in this project:
- Zynthian and Clumsy MIDI
- Waveshare 4″ HDMI LCD for Raspberry Pi
- Zynthian UI Users Guide
- Zynthian Configuration Users Guide (Wiring Layout)
- Zynthian Forum: “Encoders directly to the GPIO of the Pi 4”
If you are new to microcontrollers, see the Getting Started pages.
Parts list
- Raspberry Pi 3 or 4 with SD card, PSU etc.
- Waveshare 4″ HDMI LCD for Raspberry Pi
- Optional: mini to full HDMI lead.
- Optional: 8086 Butterfly for the Raspberry Pi (available from Tindie or The Pi-Hut)
- Optional: MIDI Interface
- Optional: I2S Audio DAC
- Jumper wires
The Circuit
The basic connections are as described in my original article: Zynthian and Clumsy MIDI. I’m still using my Clumsy MIDI for the MIDI interface and audio output.
What is changed here is that I’m adding the following:
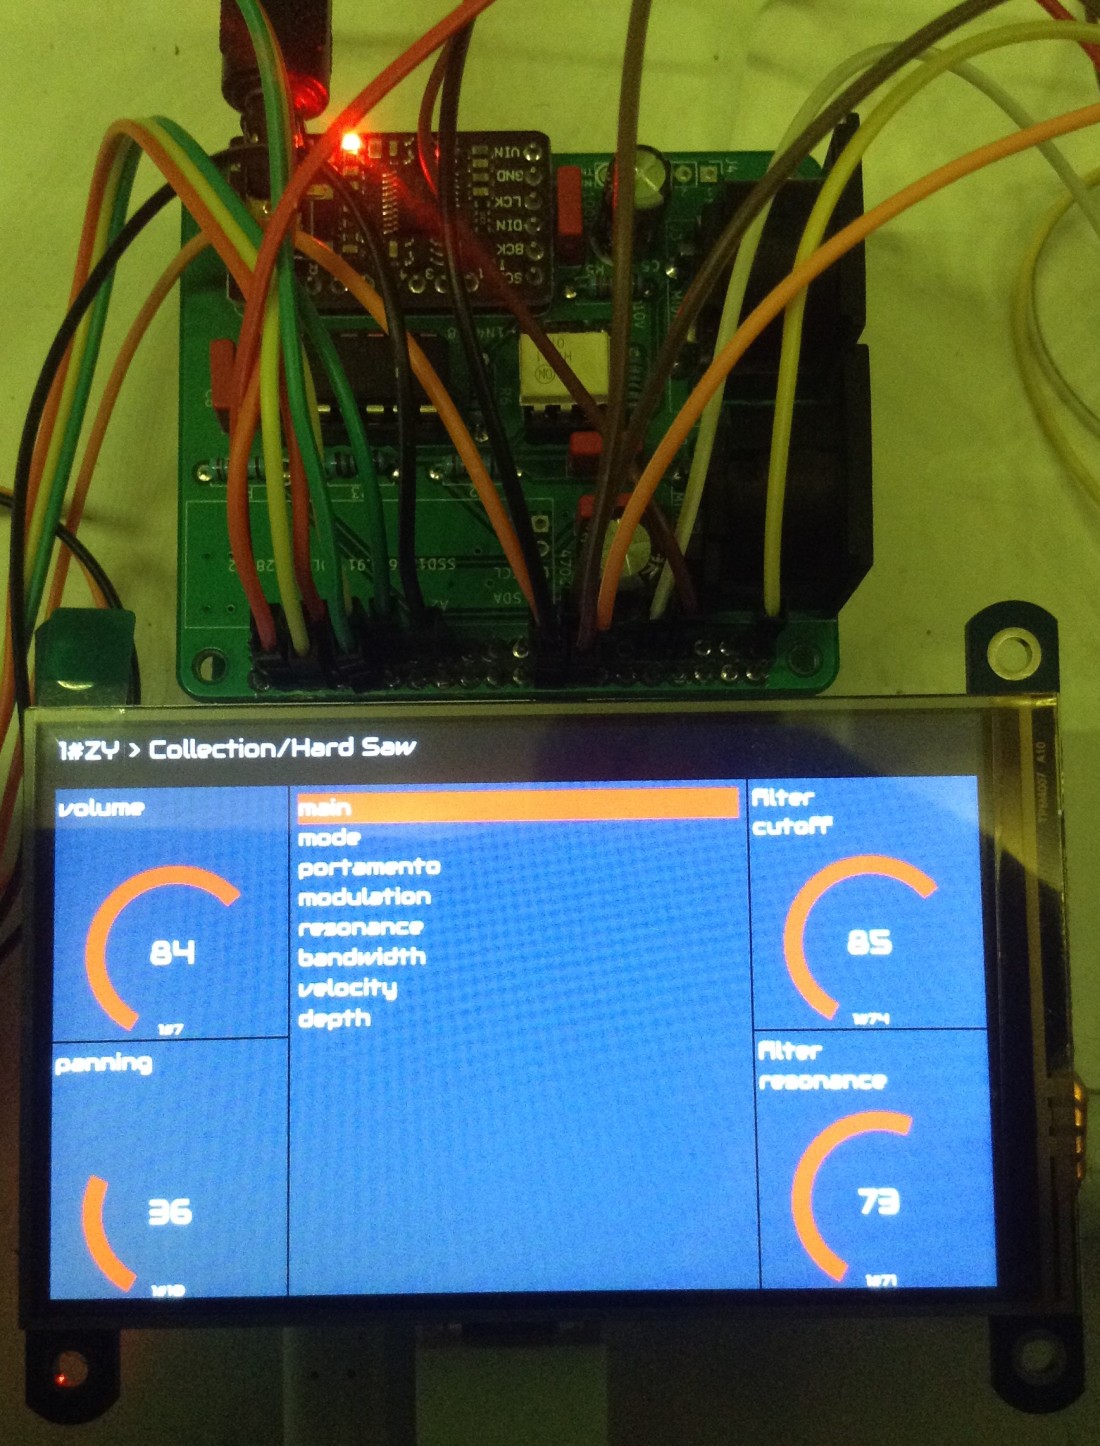
- The Waveshare 4″ HDMI LCD. This connects using HDMI for the display and GPIO for the touchscreen.
- Four rotary encoders. These all need 3V and GND and then three GPIO pins each.
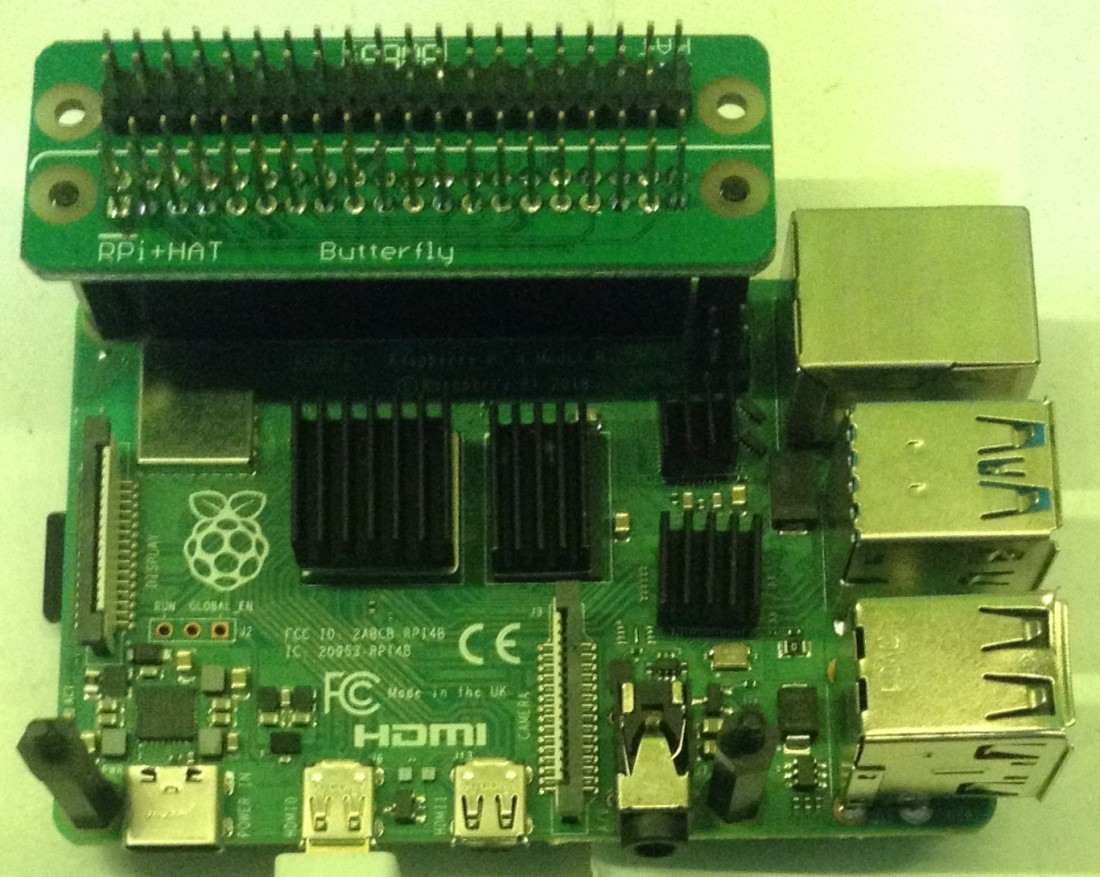
As the display is designed to connect directly to the Pi, there is no access to the GPIO headers for other uses. So my suggested solution is to use the “Butterfly” breakout from “8086”. This allows the use of two Pi HATs back to back., providing there are no GPIO pin clashes.

I’m then using additional header pins on my Clumsy MIDI to hooked up, using jumper wires, to the encoders.
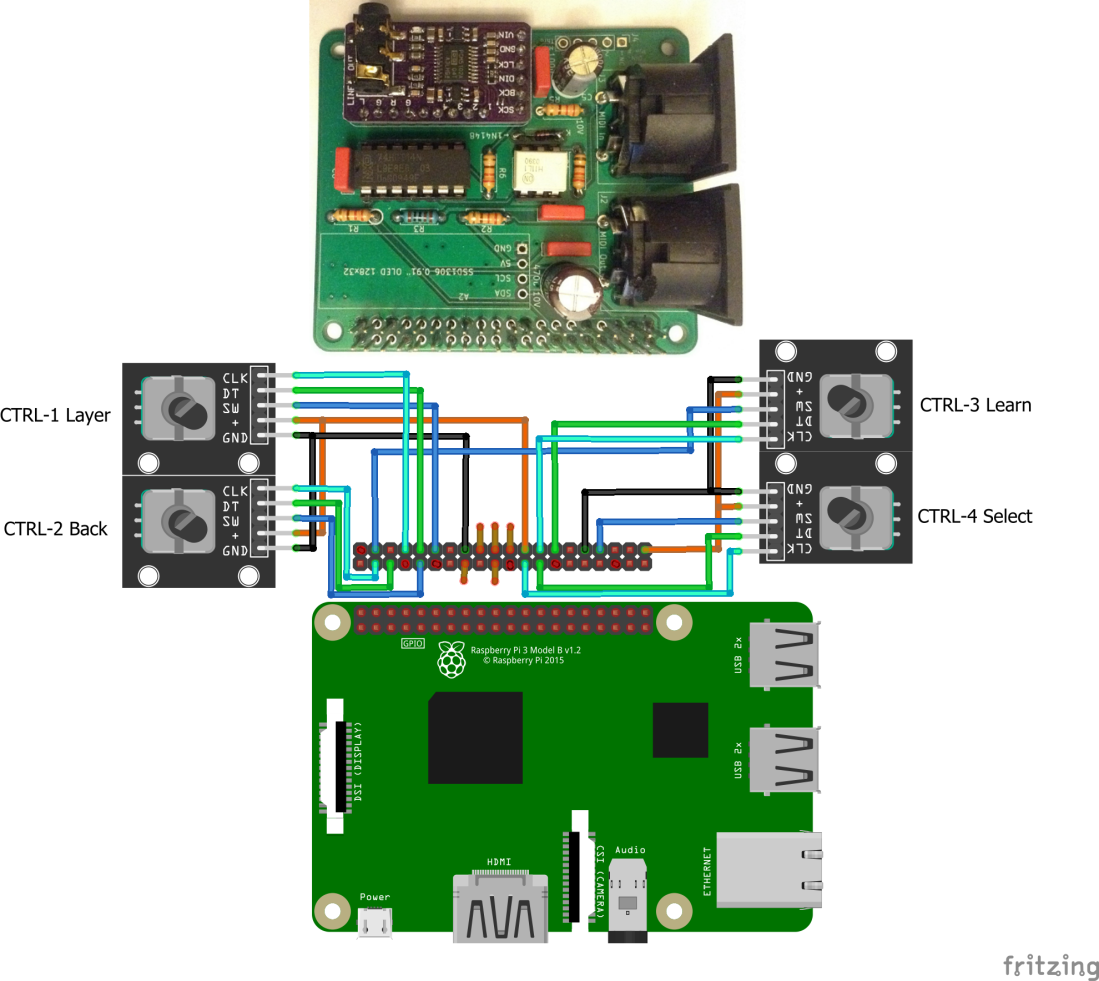
It has to be noted that the Butterfly rotates the GPIO – the idea is that the two HATs can be connected “back to back”. This means that pin 1 is on the left hand side of the Raspberry Pi, but on the right hand side of the Clumsy MIDI (now rotated through 180°) via the Butterfly.
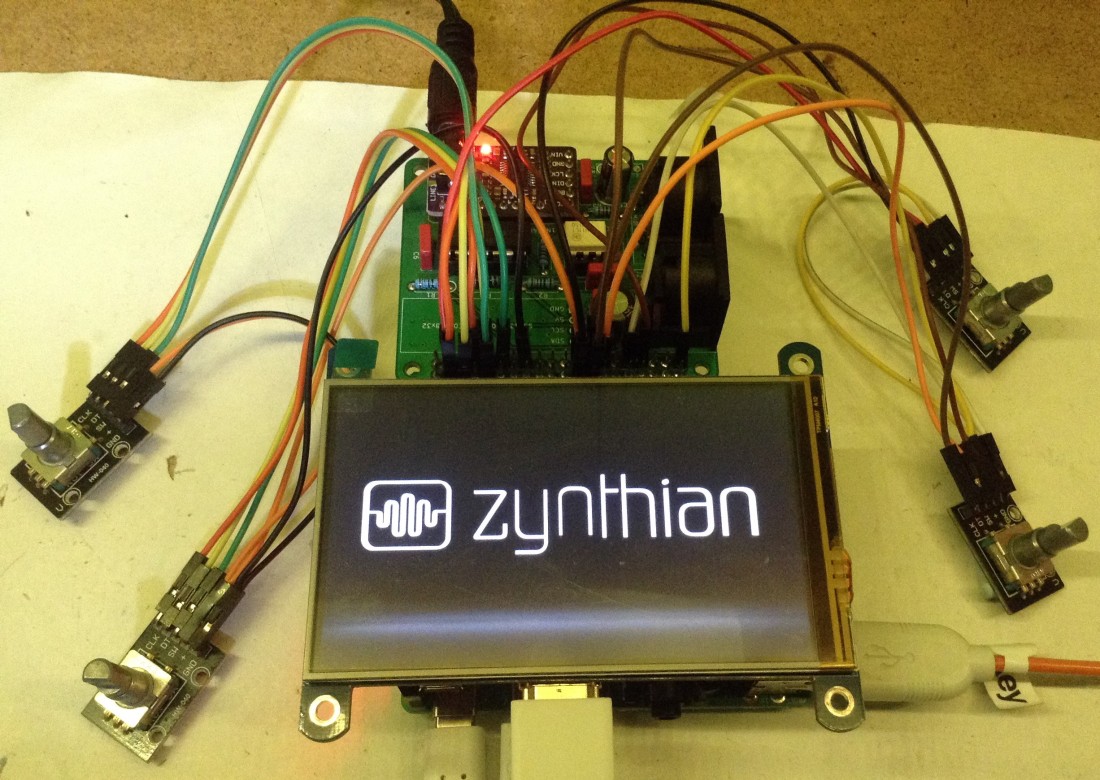
Here are some photos that hopefully show you what I mean.
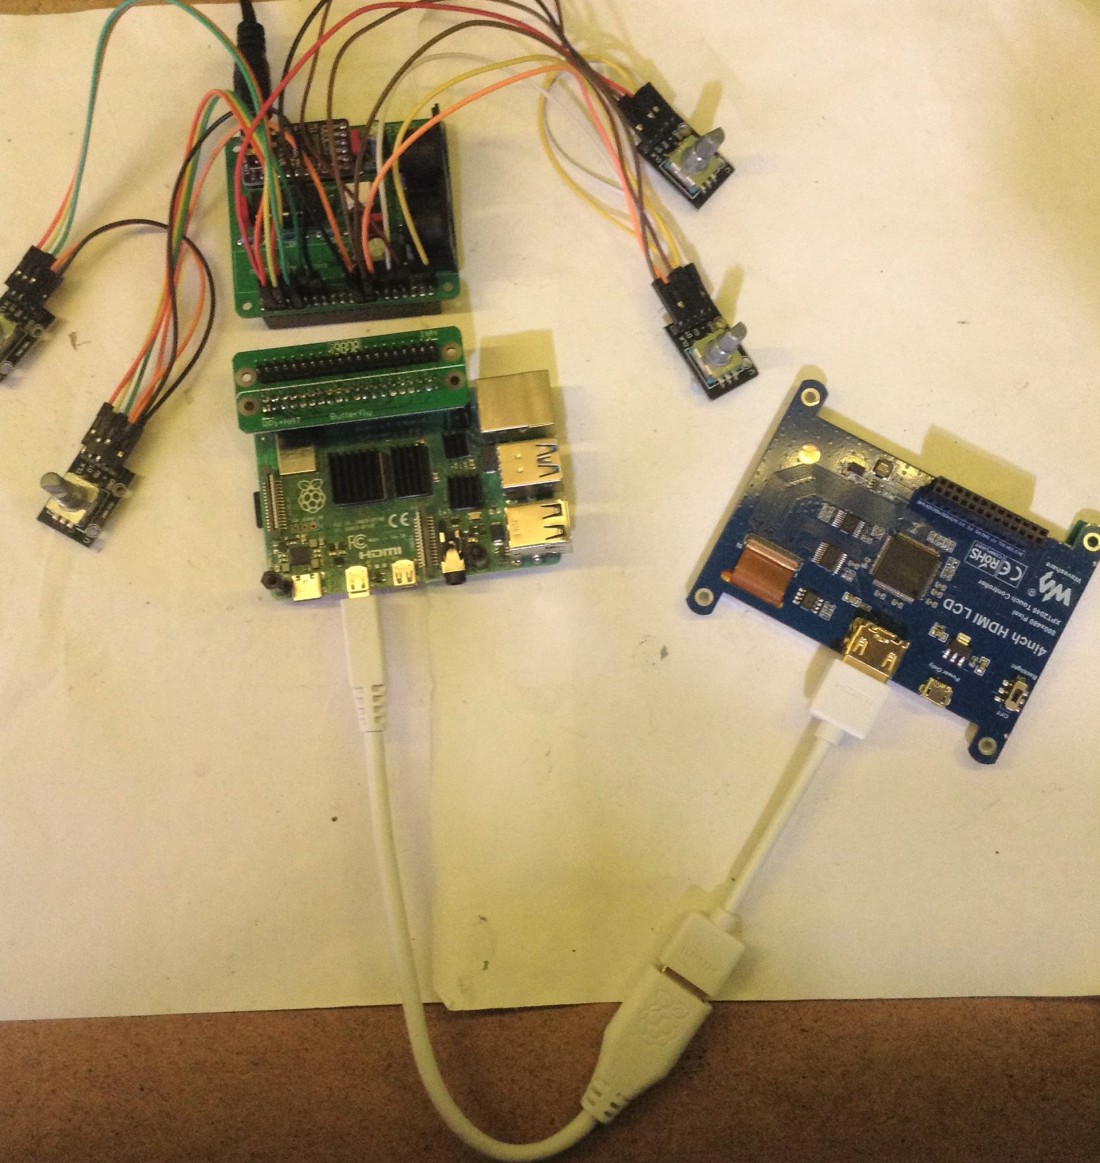
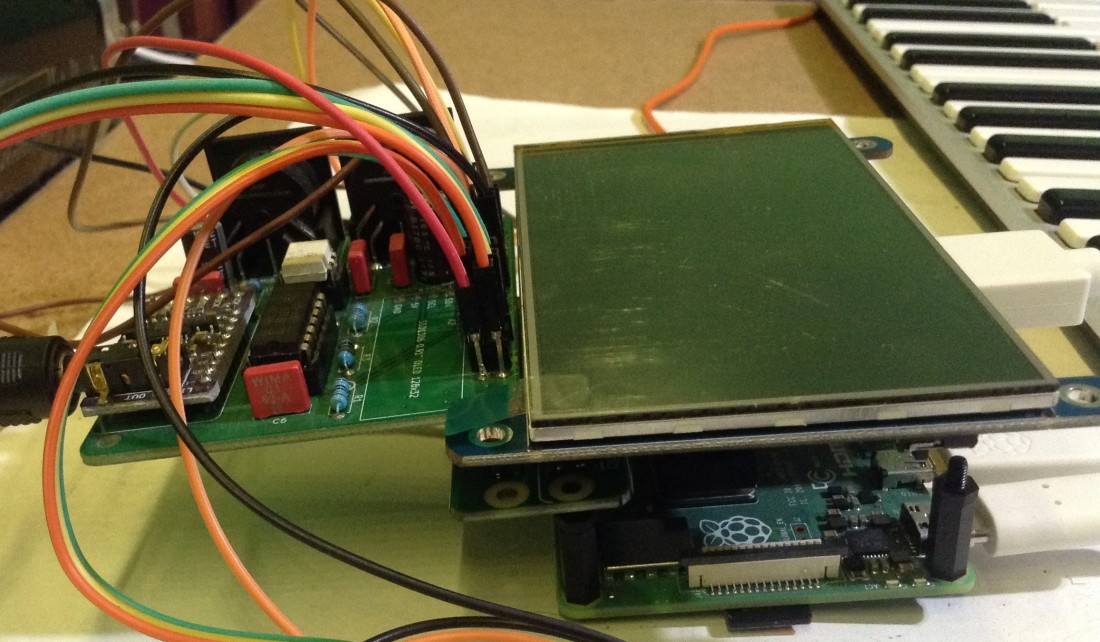
The Waveshare display comes with a neat little circuit board that allows you to really tidily connect the display and the Pi’s HDMI ports together. Unfortunately, because I’m using a GPIO extender, I can’t use it, so I’ve had to use leads and adaptors instead.
Audio out will come from the DAC on the Clumsy MIDI and I can use MIDI over serial (via the Clumsy MIDI) or USB (directly into the Pi) as required.
The Code
In principle, setting up and running Zynthian to support the above hardware should be relatively straight forward. But there were a few quirks that need mention here.
First of all, the main installation and configuration is described in my previous post, so I suggest starting there: Zynthian and Clumsy MIDI. Once it is up and running with a “normal” display and mouse, then add the independent display and control hardware. This is all best done using the web configuration interface as described here: https://wiki.zynthian.org/index.php/Configuration_Users_Guide
The display is fully supported – there is an option in the configuration to select it directly and the DAC is still as before.
There was one quirk with the display – in the default configuration, it comes up as “display_rotate=3” (this is when you expand the “advanced” configuration part for the Display section). This worked, but the touchscreen was out of alignment.
I tried a few things:
- Adding swapxy=1 to the “dtoverlay” configuration line.
- Adding Option “SwapAxes” “1” to the /etc/X11/xorg.conf.d/99-calibration.conf file (I had to SSH into a console on the Pi to try this).
- Re-calibrating the touchscreen a few times (using the Zynthian user-interface Admin section).
Eventually the configuration that worked for me was the following:
- swapxy=1 in the dtoverlay line.
- display_rotate=1.
- Then calibrate the touchscreen.
This gives me a landscape display, with the GPIO at the top and with a working touchscreen.
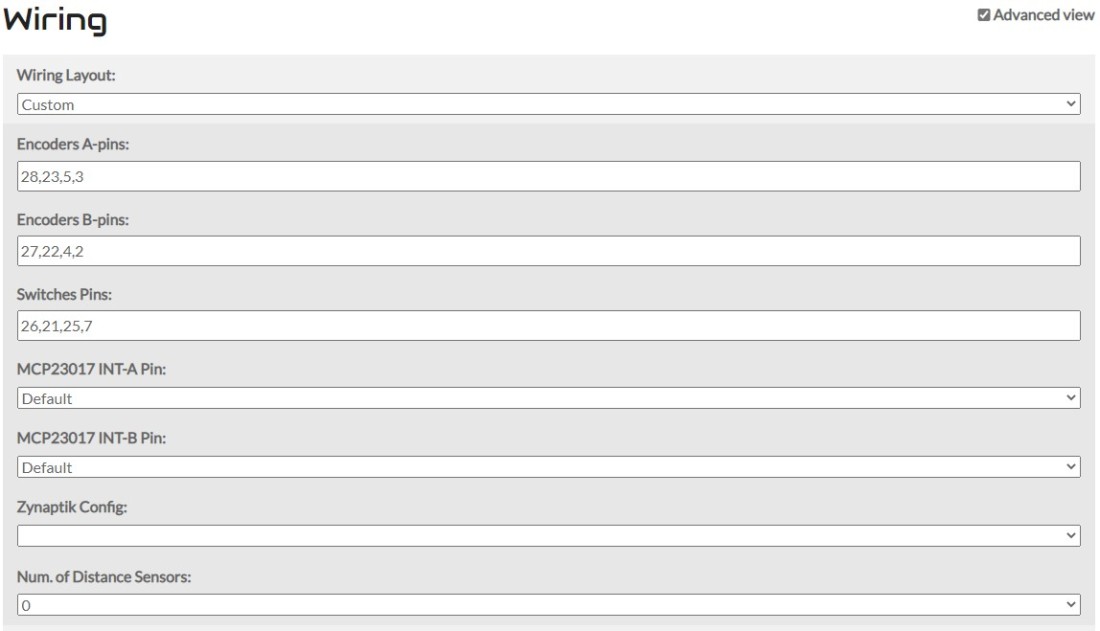
The encoders are set up using a custom (not “dummy”) Wiring configuration. Here is the GPIO map I’m working to.
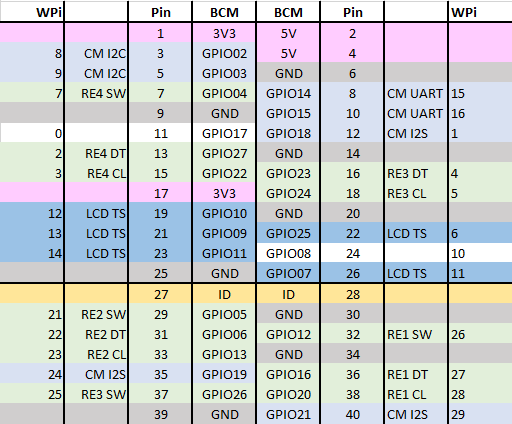
One slight complication (that I didn’t seem to find mentioned anywhere in the manuals or guides, but eventually inferred from the forums) is that the pin numbers on the configuration screen using Wiring Pi pin numbers, which is an abstraction over the GPIO numbers. It wasn’t something I’d come across before and was a source of quite a bit of confusion for a while.
Basically my first attempt at configuration (using GPIO numbers) came up with a Zynthian error screen. It had to go into the web config and fire up the Interface -> UI Log. Then I could see a range of errors that certain gpio ports didn’t exist. Using Wiring Pi numbers fixed that.
Well almost, there were two further problems: I wanted to use GPIO17, which is Wiring Pi pin number 0. But Zynthian seems to treat 0 as “not used”. And for some unknown reason there seemed to be a problem with GPIO08 too. Eventually the map shown above is the one that worked.
Closing Thoughts
You can see the encoders working in the (not particularly inspiring, I know) demo video above. The touchscreen is fully functional too, but to be honest it is much simpler to control via the encoders!
The official Zynthian configuration uses MPC23017 IO expanders – and seeing how basically all usable GPIO pins have been used up supporting the above configuration, I can see why.
Where I’m really going with this though is to eventually have it all in some kind of usable case or housing. Possibly as one of my CD Rack Synthesizer Projects. I probably have all the parts now to do it, I just need to make some decisions about mounting, interconnecting, and if it is worth me making any kind of custom board to simplify connecting up the IO.
Kevin
