I’ve been using my Korg Minikeys for testing a number of these projects, which usually means breaking out my Mini USB-MIDI to MIDI converter, but that means I need to find jumper wires, power, etc, so I thought it would be interesting to mount the appropriate components onto an Arduino pro-shield to create an entire “USB MIDI coprocessor” in a shield. I wasn’t too bothered about having “real MIDI” though in this case – being able to drive the Arduino using its RX pin is fine.
The key theory and core details used in this project can be found in the Mini USB-MIDI to MIDI and Simple USB-MIDI to MIDI projects.
Warning! I strongly recommend using an old or second hand keyboard for your MIDI experiments. I am not responsible for any damage to expensive instruments!
If you are new to Arduino, see the Getting Started pages.
Parts list
- Arduino Pro Mini – Must be the 3.3V (8MHz) version
- FDTI or similar “programmer” board for the Arduino Pro Mini (must be compatible with the 3.3V version)
- Mini USB Host Shield
- SPST PCB-mounting switch
- Male headers
- Arduino stacking headers
- Arduino Proto Shield
- Jumper wires
The Circuit
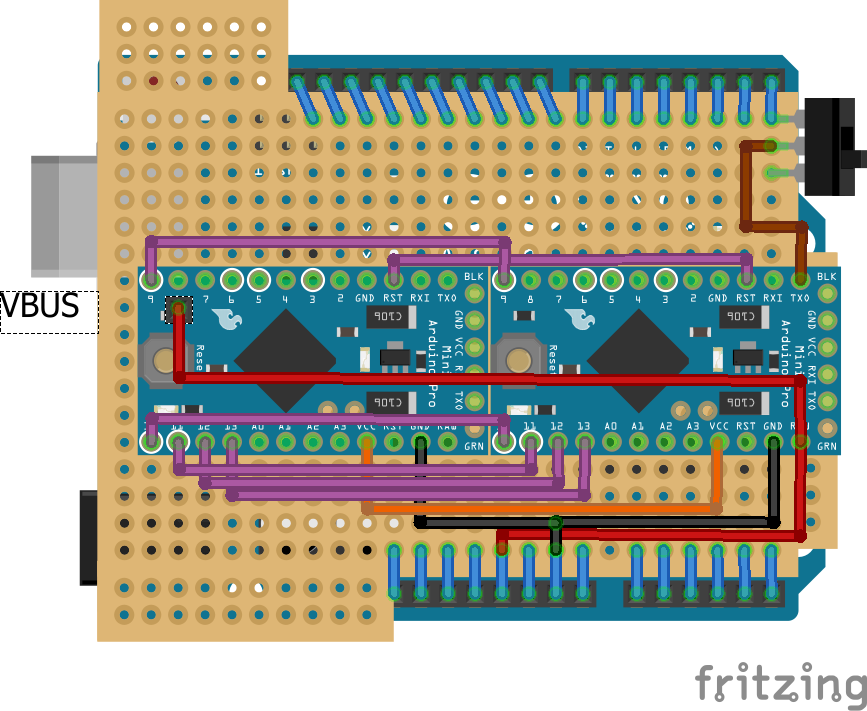
Once again I am using standard proto board in the diagram to stand in for the Arduino Proto Shield. I also couldn’t find a Fritzing part for the Mini USB Host Shield, that second Pro Mini (on the left) is standing in for the USB host shield.
The basic idea is to take the Arduino Pro Mini and the USB host shield and separate them out to sit side by side on a proto shield and then connect 5V, GND and TX to the shield. A switch has been added to disable the TX-RX link during programming of the Arduino.
Once again, the VBUS jumper has to be connected to the 5V signal rather than the built-in 3.3V line from the Pro Mini, and once again I’ve had to cut the track that connects the USB socket’s power pins to the rest of the board. For full details, see the Mini USB-MIDI to MIDI project.
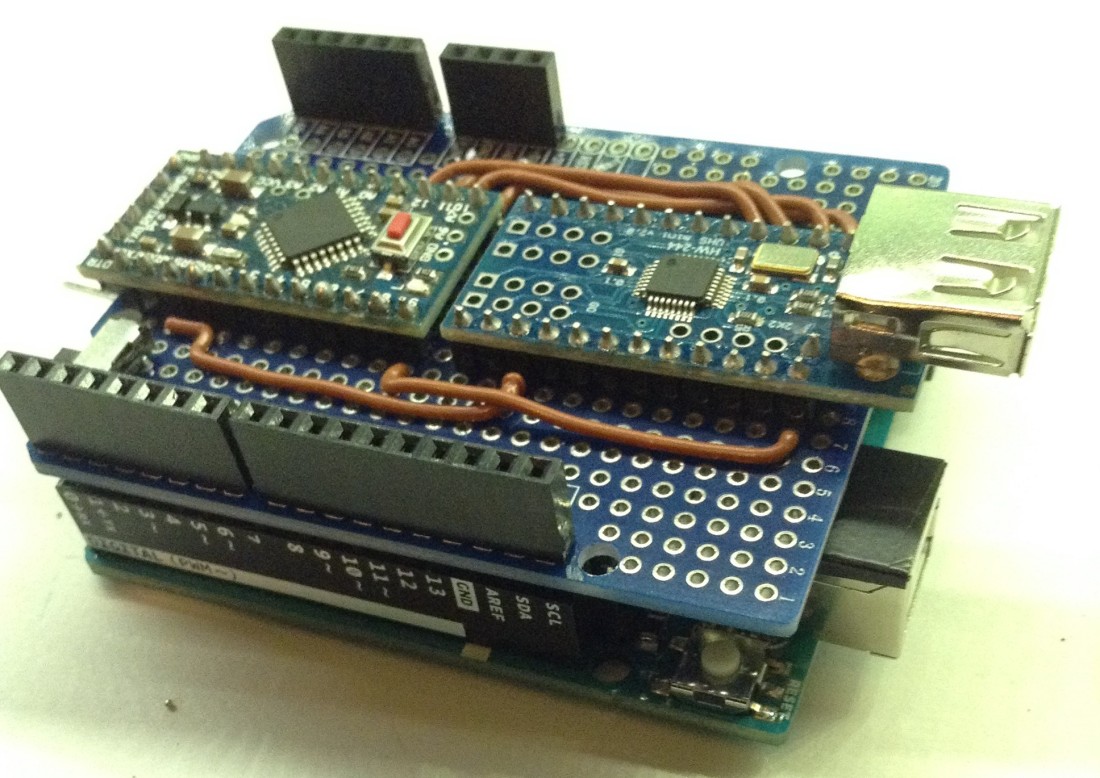
As the USB host shield is mounted on a proto shield, an extra header pin has been soldered into the VBUS hole for linking through to the proto shield for easy connection. This, and the cut trace for VBUS, can be seen below.


These were then soldered onto the proto board, followed by the SPST switch and then jumper wires were used to make the various connections. Note that I added programming headers to the Pro Mini before placement, although as I was using the same code as before, I was able to programme it before mounting anyway.
Here are some photos of the construction in progress.


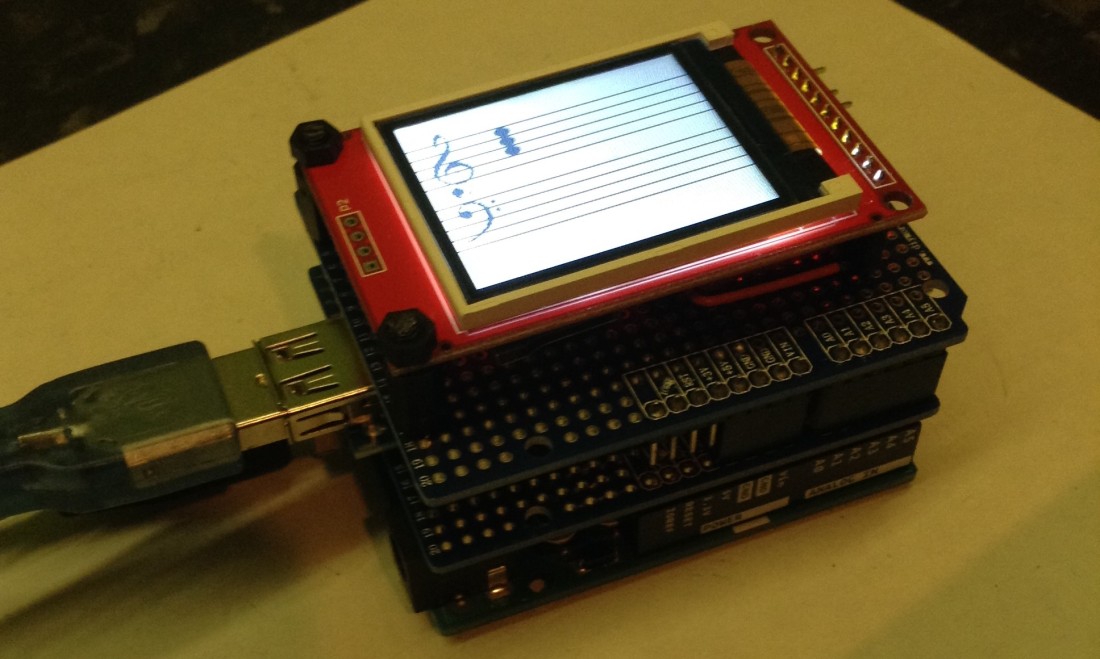
And here it is plugged into an Arduino Uno. Note that I’ve had to add some insulating tape to the Uno’s USB port so it doesn’t short on the underside of the shield. If you are using an Uno with a micro-USB or mini-USB you’ll probably be ok.
The Code
As with the two previous projects this is just using the standard USB_MIDI_Converter example from the USB Host Shield Library, which can be found here:
Closing Thoughts
I’ve paired this up with my TFT MIDI Display – Part 2 and am very pleased with the results! This will make building other USB-MIDI driven projects a lot simpler.
Now that there is basically a second complete Arduino running as a co-processor on the shield there are lots of other possibilities too. The obvious one is some kind of Arduino MIDI Filter.
It would be good to be able to add a hardware switch to determine the MIDI channel to use. Another option would be some kind of return communication from the Arduino Uno to the Pro Mini to indicate which MIDI channels to use.
Kevin
